ARC Raiders Harvester Guide: How to Complete the Harvester Puzzle and Get Legendary Blueprints
The Harvester is the most dangerous — and most rewarding — event in ARC Raiders. Here's a complete step-by-step breakdown of how to get in, solve the puzzle, and walk out with legendary loot.
What Is the Harvester in ARC Raiders?
 — Harvester —
If you've put serious time into ARC Raiders, you already know that legendary blueprints are the endgame. The weapons and gear crafted from them — including the Equalizer and the Jupiter — represent the highest tier of power available in the game. And the single best place to farm them is the Harvester.
The Harvester is a map event: a massive structure that appears on the map and draws in both PvE threats and enemy players. It's not a simple loot run. It's a multi-step environmental puzzle that takes place inside one of the most hostile locations in the game, surrounded by elite ARC enemies and — more often than not — other raiders who want exactly what you came for.
The reward for completing it is enormous. The center pillar opens into three lootable containers, each with a high chance of dropping a legendary blueprint. There's nothing else in ARC Raiders that consistently delivers this caliber of loot.
But getting there is only half the battle. This guide covers everything: how to approach the Harvester safely, how to get inside, how to solve the puzzle step by step, and how to make it out in one piece.
What Loot Can You Get From the Harvester?
Before diving into the mechanics, let's talk about why this event is worth the risk in the first place.
Completing the Harvester puzzle unlocks three containers inside the center pillar. Each container has a high probability of containing a legendary blueprint. The confirmed legendary drops tied to the Harvester include:
- Equalizer — Legendary blueprint
- Jupiter — Legendary blueprint
These are some of the most sought-after blueprints in the entire game, and the Harvester is the most reliable way to obtain them. No other map event or loot source comes close in terms of legendary drop rate.
On top of the center pillar rewards, the Harvester's interior also contains breachable containers scattered throughout the upper level. While you shouldn't waste time on these during the puzzle itself, they're worth looting after the event is complete and the environmental hazards have stopped — more on that later.
Step 1: Getting to the Harvester Safely
The Harvester doesn't just sit open and unguarded. It's one of the most fortified locations on the map, protected by a combination of elite ARC enemies that make a careless approach a quick death sentence.
What You're Up Against
Expect the following ARC guarding the exterior of the Harvester:
- Hornets — Fast, aggressive flying ARC that will quickly close distance
- A Rocketeer — High-damage ranged threat that can shred you from a distance
- A Queen or Matriarch — The heaviest presence, commanding the area and significantly more dangerous than standard ARC
With this combination guarding the three openings of the Harvester, simply sprinting in isn't viable without a plan. You have three realistic approaches:
Approach Option 1: Photoelectric Cloak (Fastest, Riskiest vs Players)
The most elegant solution is a Photoelectric Cloak. Equip it, activate it, and walk directly to one of the Harvester's three doors without alerting a single ARC enemy. The cloak masks you from their detection entirely, letting you bypass the entire exterior fight.
The catch? Other players can still hear you, and the Harvester is a known hotspot. If hostile players are already working the event or positioned nearby, the cloak won't save you from a well-timed ambush. It buys you time against ARC but don't treat it as full invisibility in a contested scenario.
Best used when: You have a cloak available and want to get inside quickly with minimal noise.
Approach Option 2: Smoke Grenade Sprint (Cheap and Effective)
If you don't have a Photoelectric Cloak, the smoke grenade sprint is the next best option and costs far less in terms of loadout investment.
Watch the Harvester's openings and wait for a moment when no ARC are directly in front of an entrance. The enemies do patrol and shift positions, so patience here pays off. When you see a window:
- Throw a smoke grenade toward the entrance
- Sprint directly through it and into the Harvester door
The smoke disrupts line of sight from ARC long enough to get you through the door without taking significant damage. It's not perfect — you may catch a hit or two depending on timing — but it's fast, cheap, and repeatable across runs.
Best used when: You're running a budget loadout or want to conserve resources.
Approach Option 3: Clear the ARC (Safest Inside, Slowest Overall)
The most time-consuming but ultimately safest approach is to eliminate the ARC before entering. With the right tools, this is more manageable than it sounds:
- Showstopper grenades deal heavy damage to the flying Hornets
- Wolf Pack grenades are excellent for clearing the aerial ARC efficiently
Focus fire on the Hornets first since they're the most mobile threat. The Rocketeer can be handled at range once the Hornets are down. Be aware that engaging the Queen or Matriarch aggressively is an investment of time and ammo — assess whether it's worth the full clear versus a tactical entry.
Clearing the exterior takes longer before you can start the puzzle, but it dramatically reduces the chaos inside and removes the risk of ARC interference while you're solving it.
Best used when: You're in a coordinated squad and can split the ARC clear efficiently, or when you want the safest possible environment for the puzzle.
Step 2: Breaching the Harvester Vents
The Harvester has three openings, each covered by vents. These aren't just cosmetic — the Harvester periodically vents fire outward, and attempting to breach a vent during a fire cycle will deal significant damage.
How to Get Through the Vents
You have two timing options:
Option A — Wait for the fire to fully stop, then breach the vent and enter cleanly with zero damage taken. This is the safer choice, especially if your shield is already damaged.
Option B — Enter just as the fire is subsiding, slipping through during the tail end of the cycle. You'll risk taking a small amount of damage but save a few seconds of waiting.
The Shield Tip
Some experienced players remove their shield before breaching the vents. The logic: if fire clips you during entry, it can crack or break your shield outright, leaving you unprotected for the puzzle. Running temporarily without a shield inside the Harvester is a calculated risk — you're slightly more vulnerable to other players who might be inside — but it protects your shield from being damaged by the vents.
Weigh this based on how contested the Harvester is when you arrive. If you have reason to believe other players are inside, keep your shield on.
Step 3: Finding and Placing the Three Canisters
Once inside the Harvester, the puzzle begins. The core mechanic revolves around locating three canisters hidden behind breachable panels and placing them into the center pillar.
 — Harvester Canisters —
Finding the Canisters
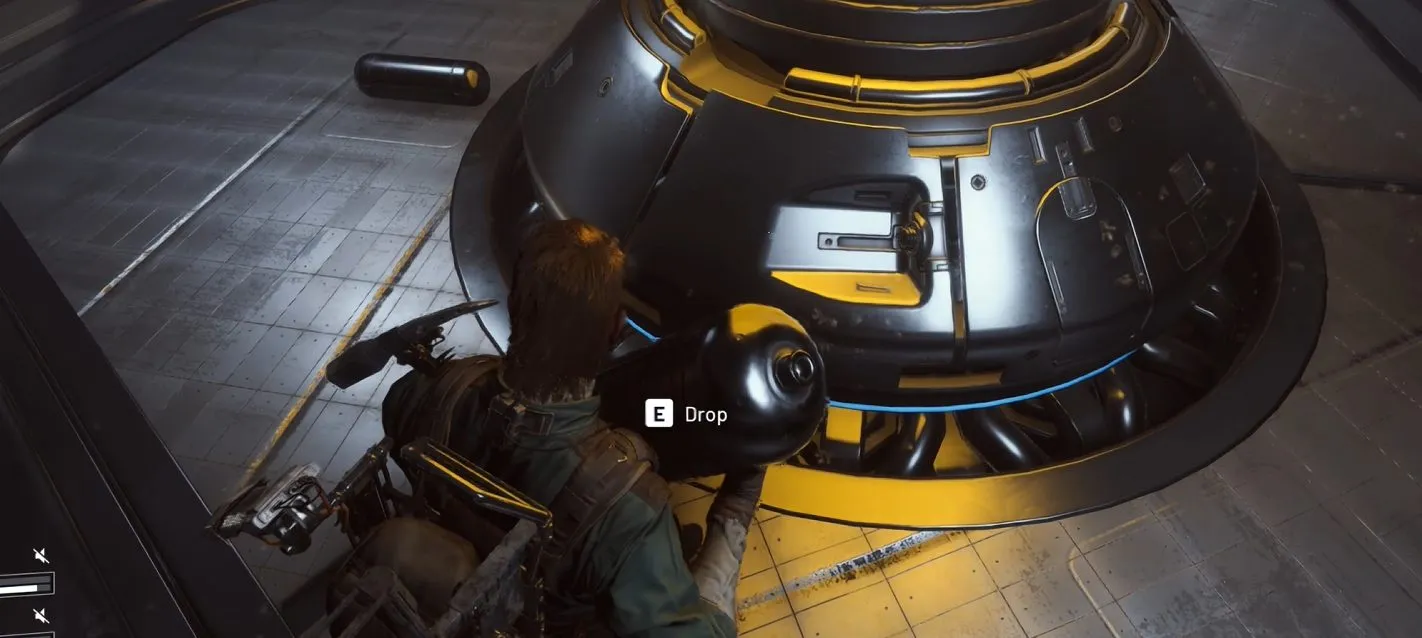
Take the risers (lifts) up to the top area of the Harvester's core. From here, start breaching the panels you find. Each canister is tucked directly behind one of these breachable panels — you'll spot them clearly once the panel is open.
As you find each canister, drop it in the center of the core area. Don't hold onto them individually — get all three canisters collected and centralized before moving to the next step.
Environmental Hazards During This Phase
The Harvester is actively hostile while you're working inside it. Two hazards to stay aware of:
1. Electrical Blasts The Harvester periodically emits electrical pulses that will shock and stun you. These are disorienting and dangerous if you're mid-breach. Stay mobile and be ready to absorb or dodge the stun.
2. Fire Vents (The Alarm) This is the critical one. If you hear an alarm sound, stop everything and immediately move to an exit. The alarm is the audio cue that the Harvester is about to vent fire internally — the same fire that cycles through the exterior vents, now happening inside. Exit options during this phase include:
- The side vents you came through
- The upper level exit above the core
Do not try to tank the fire. Get out, wait for the cycle to end, then return to the canisters. Dying inside the Harvester while carrying your loot is a brutal way to lose a run.
One Important Note on the Breachable Containers
You'll notice other breachable containers inside the Harvester beyond the ones hiding the canisters. Do not stop to loot these during the puzzle. The environmental hazards are still active, and time spent looting secondary containers is time spent exposed to fire vents and electrical blasts. Save those containers for after the puzzle is complete — the hazards stop entirely once you've finished.
Step 4: Slotting the Canisters into the Center Pillar
With all three canisters collected and placed in the center of the core, the next phase begins: loading them into the center pillar.
Breach open the three slots on the center pillar. Then slot each canister in.
Pay attention to the timer. The moment the first canister is placed, a countdown starts. You must slot all three canisters before the timer expires. With three canisters and one player this is manageable — with a squad, you can split the task and do it almost simultaneously.
Step 5: Destroying the Yellow Lights
Once all three canisters are inside the pillar, yellow lights will activate at various points around the Harvester. Your job is simple: shoot and destroy every single one of them before the timer runs out.
This is the phase where having a squad or cooperating with other players pays off most. The lights are spread around the structure and the timer doesn't give you much room to solo the whole thing without good positioning. A coordinated squad can divide the structure into zones and clear all the lights quickly.
If the timer runs out before all lights are destroyed, you don't have to start completely over. The canisters go back into the pillar reset, but the progress on destroyed lights carries over. You'll pick up from where you left off on the remaining lights after re-slotting the canisters.
Step 6: Claim Your Legendary Loot
Once all the yellow lights are gone, the center pillar opens. Inside: three lootable containers, each with a high probability of containing a legendary blueprint — the Equalizer, the Jupiter, or other high-tier rewards.
With the puzzle complete, the Harvester's environmental hazards — the electrical blasts and fire vents — shut down entirely. This is your window to go back through the upper level and loot all the breachable containers you ignored during the puzzle. They're now safe to search at your own pace.
Step 7: Extracting Safely
You have the loot. Now you have to keep it. The post-puzzle extract is its own challenge:
- The Queen or Matriarch may still be active around the exterior. Plan your exit route to avoid her patrol or be ready to sprint past her.
- Hostile players who were waiting out the puzzle (or who just arrived) may be positioned at the exits. The moment the pillar opens, the Harvester becomes a target for anyone nearby who saw the event trigger.
Consider your extract path before you open the pillar, not after. Know which exit you're using and have your smoke grenades ready if you need to create cover on the way out.
Harvester Puzzle: Full Step-by-Step Summary
For quick reference mid-session, here's the complete flow condensed:
- Approach — Use Photoelectric Cloak, smoke grenade sprint, or clear the ARC exterior
- Breach the vents — Time your entry between fire cycles; consider removing shield
- Find all three canisters — Use risers to reach the upper core, breach panels, drop canisters in center
- Watch for hazards — Evacuate on alarm sound; avoid secondary containers until after puzzle
- Slot canisters into center pillar — Breach the three slots, slot all three before timer expires
- Destroy all yellow lights — Shoot every light before the secondary timer runs out; progress carries over on failure
- Loot the center pillar — Three containers, high legendary blueprint drop rate
- Loot secondary containers — Now safe with hazards disabled
- Extract — Avoid the Queen and hostile players on your way out
Harvester Quick Reference
| Phase | Key Action | Watch Out For |
|---|---|---|
| Approach | Cloak, smoke sprint, or clear ARC | Queen/Matriarch, Rocketeer, Hornets |
| Entry | Time vent breach between fire cycles | Fire damage, shield degradation |
| Canister Hunt | Breach panels, drop all three at center | Electrical blasts, fire alarm |
| Pillar Load | Slot all 3 canisters before timer | Timer — don't delay after first canister |
| Light Phase | Shoot all yellow lights before timer | Timer — squad helps significantly here |
| Loot | Open center pillar containers | Hostile players converging on loot |
| Extract | Leave before other players reposition | Queen patrol, ambushes at exits |
Final Tips for the Harvester
- Never loot secondary containers during the puzzle. Wait until it's complete and the hazards are off.
- The alarm sound is your most important cue. The moment you hear it, move toward an exit — no exceptions.
- Cooperate when possible. Even with strangers, the yellow light phase benefits enormously from multiple shooters. Consider a temporary truce with other players inside.
- Smoke grenades are underrated here. Useful both for the initial entry and for a chaotic extract when the loot opens and everyone outside moves in.
- Night runs may reduce player competition. The Harvester will always draw attention, but off-peak timing can reduce how many hostile raiders you're dealing with simultaneously.
The Harvester is the pinnacle challenge of ARC Raiders — dangerous, chaotic, and completely worth it. Master the puzzle, and legendary blueprints stop being a rare dream and start being a reliable part of your progression.
Guide based on community testing and in-game observation. Found a faster route through the light phase or a better approach strategy? Share it in the comments.